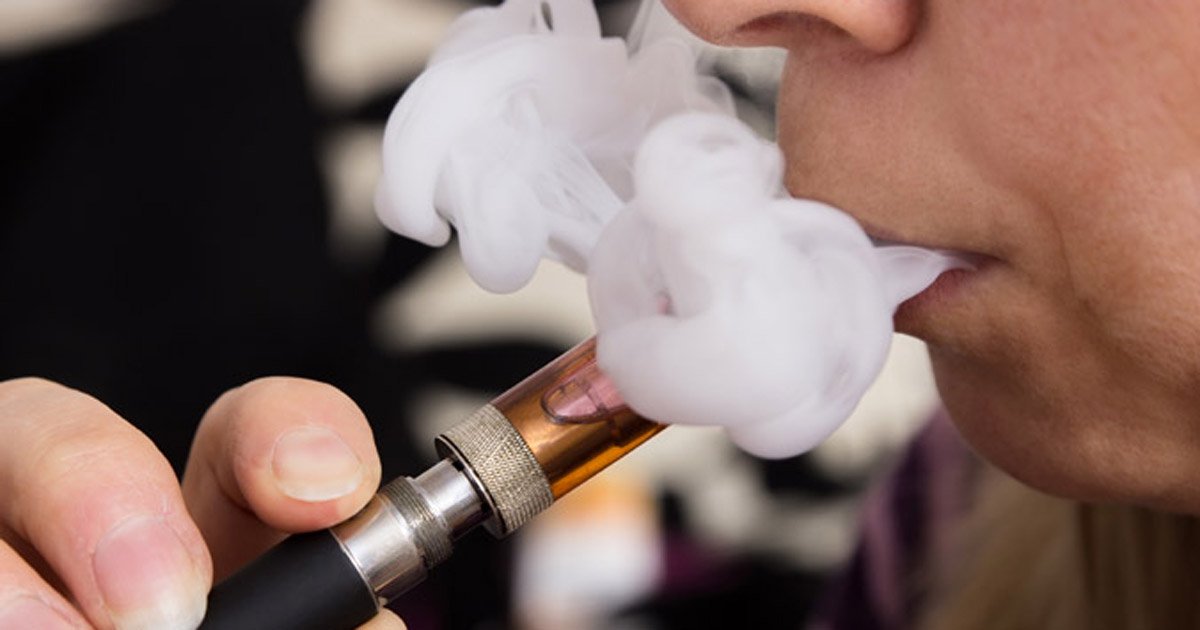
 Thee-liquid request is constantly expanding, with brands coming up with unique flavors to appeal to druggies. At the moment, different flavor choices allow druggies to trial and identify the perfect options to match their taste. But vape suckers frequently find joy in casting custom flavors or clone popular e-liquid flavors at home.
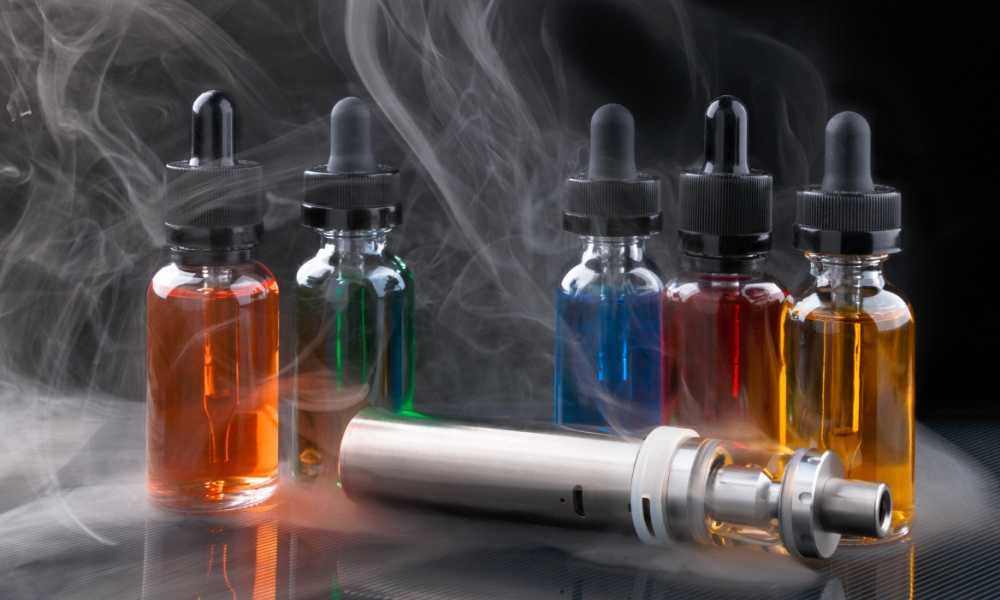
DIY e-liquids offer a vast compass to enhance your creativity and love for vaping. It also ensures that you choose high- quality constituents in your E Juice Recipes blend for a perfect vaping experience. Creating e-liquids at home is a straightforward process if followed rightly. Then there are nine elegant fashions for DIY e-liquids to try at home. What E Juice Recipes Do You Need? One of the biggest reasons behind this is the use of high- quality constituents in the perfect rate that brings together a succulent admixture of flavors. With some introductory rudiments, you can produce your custom flavors or clone popular flavors with ease. To produce similar E Juice Recipes you'll need- VG – Vegetable Glycerin has great thickness and supports slow immersion and offers vapor viscosity. PG – Propylene Glycol that's lower harmonious but gives a violent throat megahit. Nicotine-voluntary( You can choose from variable strengths available grounded on your demand) seasonings- Names of colorful e-liquid flavor manufacturers in the request.( Buy DIY Flavors product range)
DIY E-liquid The first step to produce your E Juice Recipes is to decide the total volume you would like to prepare. For illustration, if you're going to prepare 100 ml of e-liquid, also 40 VG in the form would mean 40 ml. Also, you can go through the change of each component, including nicotine, for each form. We've mentioned the total number of days to steep the e-liquid to ensure the flavors are enhanced and bold when you vape. 1. Reproduced Castle Long Still, this manual form will be the perfect clone of this amazing flavor, If you're an addict of the castle long e-liquid. The roasted almond adulation dominates the aroma of this admixture. You can experiment with many fruit flavors to balance the bourbon to produce your variation.
2. Dr. Pepper Recreating the original flavors of the each- time favorite Dr. Pepper drink, this form is the perfect balance of spice and sweet. While the flavor is formerly punchy, you can add the nicotine strength of your choice to elevate the experience.
3. Mustard Milk A stunning combination of strawberry and vanilla ice cream, this delicate admixture subtly balances the two flavors to produce an extraordinary e-liquid.
4. Pumpkin Pie Inspired from the sweet pumpkin pie that brims with a gleeful vibe, this form brings your favorite thanksgiving flavors to your vape pens. The combination of succulent flavors in those-liquid blends is quite an instigative choice to explore.
5. Candy Bar Candy Bar brings together a striking combination of sweet flavors to tantalize your taste kids. The elegant flavor admixture is the perfect choice for easing your sweet tooth and bringing back a rush of nonage recollections.
6. Strawberry Fog Strawberry fog sums up all your favorite goodies into a single form that's strikingly sweet and delicate. It's among the most succulent e-liquid amalgamations to prepare at home.
7. Dragon's Blood Dragon s blood blends a diapason of constituents with complex taste biographies that leaves a fresh and gooey after- feeling.
8. Herbal Infusion This herbal infusion flavor is for all the green tea suckers as it brings out the alluring green aroma painlessly with hints of gooey flavors.
9. Reproduced Halo Malibu Cloning the taste of Halo Malibu, this form brings together refreshing flavors of coconut, pineapple, and rum with hints of menthol.
These are some of the most popular e-liquid fashions that have managed to become stoner pets. With the help of the right flavor concentrates and high- quality constituents, you can draft some perfecte-liquids for a fun vaping experience. Try these simple DIY fashions at home and trial with these selections to produce your own amalgamations.
0 Comments
 DIY E Liquid preface
I guess most people reading this clued up enough when it comes to electronic cigarettes still for you newbies out there I'll be kind and give you a quick rundown. Hang on the rest of you, we shall get to the DIY E Liquid stuff veritably soon. Detail preamble to DIY E Liquid Electronic Cigarettes or E Cigs as they're being decreasingly known are the ultramodern way to quit smoking. They're the electronic equivalent to regular cigarettes offering the stoner the same.or should I say analogous smoking experience but without exposing them to the thousands of dangerous chemicals. The image below shows an average looking electronic cigarette with its labeled corridor What e cigs are composed of Image of electronic cigarette with labeled corridor electronic cigarette Electronic cigarettes contain e liquid and this e liquid generally contains nicotine and an added flavour. DIY E liquid I'm presuming it’s no accident that you have set up yourself then on this runner reading this companion you want to know how to mix e liquid right? Whether you want to mix e liquids because you need a hobby horse, you're feeling creative and wish to produce new instigative and fantastic flavours or are just looking to save a lot of £££ you have come to the right place. DIY( Do It Yourself) really is a great way to learn and expand your knowledge. Still its real benefit is the quantum of control it provides. While making your own e liquid you have 100% control of the constituents and how it’s made including the base you use, the flavour/ s( and attention of these flavours) and nicotine position. Hang On Just A Tad Longer. It's important to note at this stage that before we get going that you have a introductory understanding of electronic cigarettes. Any of you that are new to vaping I explosively recommend that before you start on your trip into the world of DIY E Liquid you buy and try many pre-made flavours to see what flavours and strengths you like and vice versa. Flash back that a smoker has an inferior sense of taste than that of a non smoker. This is because your gustatory cells( or taste whim-whams cells) are set up in the taste kids of the mouth and throat. The gustatory cells reply to food and drinks together with your slaver. The maturity of your taste cells are set up on your taste kids positioned on the lingo and these shoot information using near jitters which bear the communication onto the brain. Smoking causes differences to the process described over and accordingly affects the way you taste your food. Since you have quit smoking your body starts to repair itself, a clever thing, which results in you recovering your sense of taste. This means that that apple flavour juice that you could n’t stand is now your new favourite drink. DIY E liquid inventories The inventories that you'll need( if you do n’t have them formerly) will depend on if you're going with the introductory approach or if you're being a little more audacious and taking the advanced route. Obviously if you're new to the DIY E Liquid game also you should follow the introductory instructions, this will give you a bit of a background into mixing but also if you jump straight in at the deep end you may be put off after numerous failed attempts. There are numerous e liquid DIY E Liquid accouterments available to choose from to get you started, still the general contents of these include Basic Level • Bottle Of Base • Bottle Of Chosen Flavour • Hype/ hand needle, eye dropper or pipette • Gloves Advanced Level • Bottle of VG, PG or a50/50 blend of the two with nicotine. • Bottle of VG, PG or a50/50 blend of the two with without nicotine • Bottle Of Chosen Flavour • A Many Empty Bottles • Hype/ Hand Needle, Eye Dropper or Pipette • Menthol Chargers( voluntary) • Ethyl Maltol( voluntary) • Sweetener( voluntary) • Gloves As you can see from above the advanced position inventories have many redundant pellet points added to it. You may be wondering why gloves have been included – Nicotine can be absorbed into the skin and once you start cutting the advanced nicotine position bases down it's important to be careful as only a little bit absorbed can make you feel sick. Nicotine Bases Generally there are 3 bases that you'll be dealing with. To add these up in a nutshell 1. VG( Vegetable Glycerin) Vegetable Glycerin is the thickest of the three and tends to toast up the atomizer hastily. Using VG you can anticipate to get further vapour but anticipate the life expectation of the atomizer to drop. Propylene Glycol is relatively watery and generally enhances the flavour of the e liquid. It also provides a good throat megahit. Be careful when using PG, as If overfilled, PG can blunder onto the battery – still if you have homemade batteries that are sealed also there will be no problem. A resolved admixture between VG and PG. Great tasting, vapour producing, winning combination. Important Note: Some people are apathetic to Propylene Glycol, Vegetable Glycerin orboth.However, stop using that particular nicotine base straight down and switch to another( if possible), If you suppose you may have had an antipathetic response. Introductory position DIY DIY e liquid at an introductory position is relativelystraightforward.it won’t be long before you'll be vaping down on your own custom made ejuice. How instigative!!! Directions 1. Decide on your preferred nicotine strength 2. Decide what base( PG, VG,50/50) you would like the nicotine in 3. Choose a flavour 4. Use an online e liquid calculator to determine quantities( Google the term “ e liquid calculator ”) 5. Add quantum of drops calculated by the online e liquid calculator 6. Make sure its mixed well( give good shake) 7. Enjoy 8. voluntary if the flavour is too weak add further. It's recommended that you always start low on the flavouring as you can always add to the blend still you can not take down. Example Basic DIY Admixture So I've decided after spending a long time looking at the numerous awful flavours that I would relatively like to vape a 11 mg( medium strength) PG Vanilla seasoned e liquid. So what do I need to do? • A bottle of 11 mg PG blend( 30 ml bottle) • A bottle of Vanilla Flavouring • A hype First I would go online and find an e liquid calculator and type in the applicable information into the correct boxes. E liquid form calculator Still, ‘ Target Nicotine Level ’, 'Quantum To produce ’, If you look towards the top of the image you'll see the stoner input section with five boxes labeled ‘ Nicotine Base ’. As you can see in the first two boxes I've compartmented in ‘ 11 ’ as I wanted an 11 mg e juice and since I bought an 11 mg PG blend( 30 ml bottle) the target box stays the same. The quantum to produce is how important the liquid I want to produce( ml) – since I bought a 30 ml bottle I'll make a 30 ml batch. For now we will ignore the water added section. Eventually the flavour chance is how strong/ weak you would like it. This is a particular preference and takes trial and error to find your asked strength. So according to the e liquid calculator to make my asked e juice I would need to add 2.4 ml to my bottle of 11 mg PG blend and that’s it. Really it’s that easy!! Advanced Level DIY E Liquid Advanced DIY E Liquid is a more complicated process but we aren't talking rocket wisdom or anything. In fact it’s not complicated at all but with a name like advanced DIY I had to try and make it sound like it was living up to its name. Anyway I'll use an analogous illustration to cover and stick with my old friend Mr Vanilla. I've decided this time to still have 5 mg( nicotine). What do I need this time? Directions 1. Decide on your preferred nicotine strength 2. Decide what base( PG, VG,50/50) you would like the nicotine in . Choose a flavour 4. Use a online e liquid calculator to determine quantities( Google the term “ e liquid calculator ”) 5. Enter the nicotine base and the target nicotine position, quantum to be created( ml) and flavour strength . Add the quantum of drops/ ml as expressed by the online calculator 7. Make sure its mixed well( give good shake) 8. Enjoy 9. voluntary if the flavour is too weak add further. It's recommended that you always start low on the flavouring as you can always add to the blend still you can not take down. Example Advanced DIY Admixture • A bottle of 36 mg( high strength) PG tasteless base • A 30 ml bottle of PG no nicotine unflavoured base • A bottle of Vanilla Flavouring • A hype • Empty Bottle/ s So again go online and find your e liquid calculator. Type in the applicable information into the correct boxes. 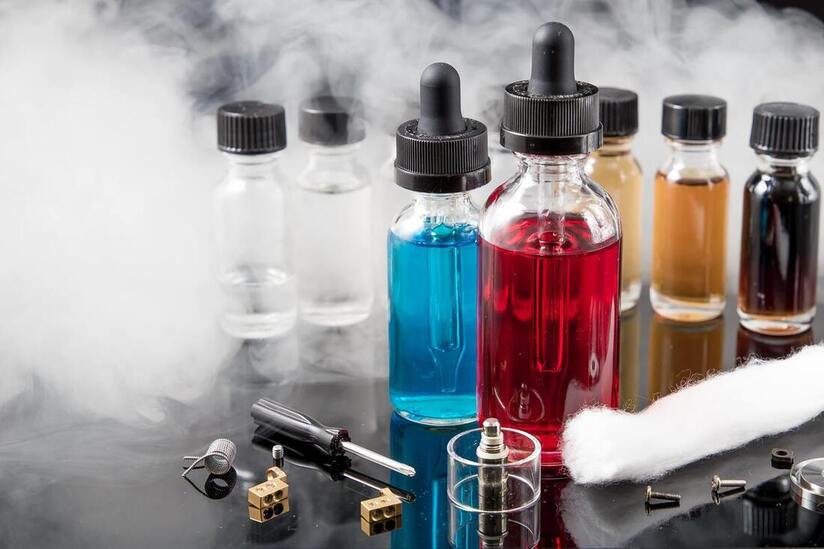 Vaping is now a trend for a wide range of people across the world. It is not just an excellent alternative to smoking cigarettes, it also has many benefits. There is fun and excitement that comes with investing in vape devices, exploring different methods, and not to mention--experimenting with various E-Liquid Concentrates. If you're a fan of drink, fruity, menthol or candies, or tobacco, the flavor choices are limitless.
If you're just beginning to learn about vaping or have an endless supply of e-liquids have you ever wondered what it was like to see vape juice come to be the thing it is in the present? If yes, then you're in luck because we'll be talking about it today! Here's a brief overview of how liquid e-liquid evolved into what it is today The Humble Beginnings of the E-Liquid Concentrates: In 2003, Hon Lik released the first electronic cigarettes that were commercially available, along with an e-liquid. In the beginning, these disposable electronic cigarettes were slim, comparable in size and shape, and available only in a few flavors. They generally had a limited battery capacity , and a certain quantity of e-juice which was not refillable. If the battery failed or the juice was gone, you just had to throw the device away. At the time the e-juices offered were extremely restricted in terms of flavor and vapour options, which ultimately led to their continued development. The Dawn of the Second Generation The popularity of e-cigarettes grew through the years and the need for new flavors and nicotine levels soon began to rise. Because of the law of supply and demand, the rational solution was to design vape kits which could be refilled with any vape juice. This is why vapes that have tanks have entered the picture. Numerous manufacturers began to produce increasing quantities of e-liquids for consumers to drink. In the beginning they focused on different flavors that had nicotine or nicotine-free content, and various ratios of PG to VG. As new products were introduced all the time the world of e-cigarettes became more flexible than ever before. Vapers quickly had the ability to choose the amount of nicotine they would like to consume as well as the flavor they wanted to experiment with, and the proportion of PG to VG they wanted. The Creation of Pod Kits and the Rising Popularity of Nic Salts The second generation of e-liquids has opened the door to the advancement of E-Liquid Concentrates that have a variety of flavors as well as nicotine content and ratios of PG to VG were introduced into the market. But the innovation didn't stop there. In time the pod kit appeared and the growing popularity of nicotine salts became evident. An excellent example is the Juul -- that tiny device that resembles a USB drive that has been a major hit in the market. The slim e-cigarette has revolutionized this world by transforming the way people use vaping. It's ideal to make nicotine salts, which are a brand new version of nicotine, and are a highly sought-after e-juice. Nic salts are believed to deliver a stronger and more powerful hit; they can be an excellent alternative for those who are looking to transition to vaping. They are a great choice because of the fact that they give a more smooth hit, even with a higher dose, yet without compromising the taste. Apart from the Juul and the Juul Plus, vape enthusiasts also are in love with these kits: the Aspire Gusto Mini, the Hexa, the SMPO kit, and many more. Conclusion It's no secret that vape juices have made significant progress, and that's the case with vaping! We hope this post has helped you understand what you should be aware of about the history behind electronic liquids as a method to elevate your vaping experience to the highest level. Are you in search of the largest range of e-juices as well as different vape products? You're in the right location, since we are a wholesale distributor of e-liquids within the UK. To purchase e-liquids and e-cigarettes as wholesale supplies, look around our website and place an order now!  The market for vaping e-juices is getting bigger every day. E-juice sales have been expanding and it seems like there are numerous flavors there. The majority of vaping enthusiasts are on the web, magazines for vaping or even books, to study new ways to vape and the best kinds of vapes, the safety of the particular vape juices, licensed stores, as well as vendors from which they can buy vape juices.
It's also becoming normal for vapers to prepare their own E-juices. This means they're inspired by recipes that have been tested to play around with different combinations of ingredients and flavors. They create unique liquids using different flavors to test various recipes. What is DIY E Liquid? DIY e-juices are often referred to with the words "DIY" - ``do it yourself" which is why they are called DIY e-juice. A common DIY E Liquid is the simplest kind of e-juice that is similar to an ordinary E-liquid purchased from a store selling vape. The one difference between them is the fact that one is "manufactured" at home resulting in a drastic reduction of the production costs, and the other one is industrially processed. The most common DIY E-Liquid is made of four components: Vegetable Glycerin (VG) Propylene Glycol (PG) Nicotine Flavoring How can you DIY E Liquid? To make a homemade e-juice, you to follow a few easy steps: Making a meal and studying it: This requires you to look through the various DIY E-Liquid for vape juice, and choose the one you like. In addition, make sure you know everything in it. Find out what the various abbreviations mean prior to doing your actual mix. Propylene glycol is often commonly abbreviated as. It is the most frequently utilized base when making DIY juices. It is distinguished by its light consistency and rapid absorption, making it an ideal base for making an e-juice that comes with powerful throat hits. Vegetable Glycerin is also abbreviated as VG. It is known for an extremely strong consistency, which results in the absorption rate to be slow. VG is the ideal choice for those who like clouds, i.e., making large and dense clouds. The PG/VG ratio in E-liquids will produce different flavors and vaping experience. The measurement of ingredients in e-juices is: After you've got the recipe you want to use and the knowledge about the components, it is important to understand how the addition is accomplished. The recipe includes the quantity (percentage) of each ingredient that needs to be included in the mix. For avoiding confusion and eventually making a vape juice that has an unpleasant taste, make sure you follow a straightforward recipe that makes use of easily understood quantities such as milliliters (mL) or drops. Making your own e-juice: The real magic is in the process of implementing the theoretical electronic juice on paper to create a real vape juice. Be sure the surroundings are always safe and clean. Most of the time, glass bottles are ideal containers to store liquids for vapes as they don't keep scents or any hints of flavor after use. In general, there are two primary methods for mixing ingredients using volume and weight. By volume demands that you utilize volumetric equipment such as Syringes to determine the quantity of ingredients. Syringes that are separate are used to fill the bottle. My weight is to utilize the e-juice me up tool before placing your bottle onto a scale for weighing. The contents of the ingredients are determined in grams in order to reach an appropriate percentage.  Are you just beginning to learn about vaping and don't know how to purchase vape juice recipes online or which is the best option for you? Over the last few years, there's been a surge of choices in the market for vape juice recipes. This can be difficult for newbies to figure out where to begin. This guide will guide you through all you should know about purchasing vape juice on the internet.
Terminology Based on where you are online (or in person) There is a chance that you will see different terms being employed. Vape juice recipes, liquids for vaping mod juice and e-juice are all terms used to describe liquids that are e-liquid concentrates. E-liquids Concentrates are the ingredients that go into electronic cigarettes to be inhaled as a vape. For those who haven't selected an electronic cigarette device We suggest you read our entire guide to Beginning Vaping and then choose the vape juice recipes later. Vape juice recipes, or e-liquid concentrates, is made up of three essential ingredients namely Propylene Glycol and Vegetable Glycerin and flavorings. Furthermore the vape juice may also contain nicotine with strengths of 3mg 6, 6mg, 9mg 12mg and 18mg. Get Your Nicotine Strength Right The right amount of nicotine is vital, particularly when you're trying to transition from smoking cigarettes to vaping. The general rule is how many cigarettes consume in, the more nicotine strength they'll need in their vape juice recipes. In general, for those who used to smoke twenty or more cigarettes per day, they'll need to go with the 18mg nicotine and for those who take less than five cigarettes per day, 3 mg of nicotine is typically enough in the vape juice recipes they consume. Ratios of Propylene Glycol and Vegetable Glycerin Propylene Glycol is generally thought to be the best option in delivering flavour. Vegetable Glycerin creates bigger clouds and provides a more smooth vape experience. Visit our blog post dedicated to this topic for all the details you require in order to be able to make an informed decision. Different Types of E-Liquid Premixed e-liquids - They can be purchased either nicotine-free or non-nicotine and are available in 10ml sizes. Like the name implies, they're fully ready for use. All you need to do is add them to your device with the right amount and then start vaping. Shortfills are not nicotine-free. but they are able to be used to take a 3mg nicotine shot. Our shortfills are all supplied with a nicotine shot for free for those who would like it. Shake and vape - This is an introduction kit to mixing for those who are aware of some of the proportions between Propylene Glycol and Vegetable Glycerin they'd like. The kit includes everything you need to create the vape juice of 30mL and there are over 100 flavors to choose from. Choose Your Flavour Every person's taste buds differ. We suggest experimenting with different flavors to discover one (or more!) that you like. If you are transitioning from traditional cigarettes and vaping suggest selecting a flavor of tobacco to begin. If you need help with any of our products or have any questions, contact our team now at [email protected]. 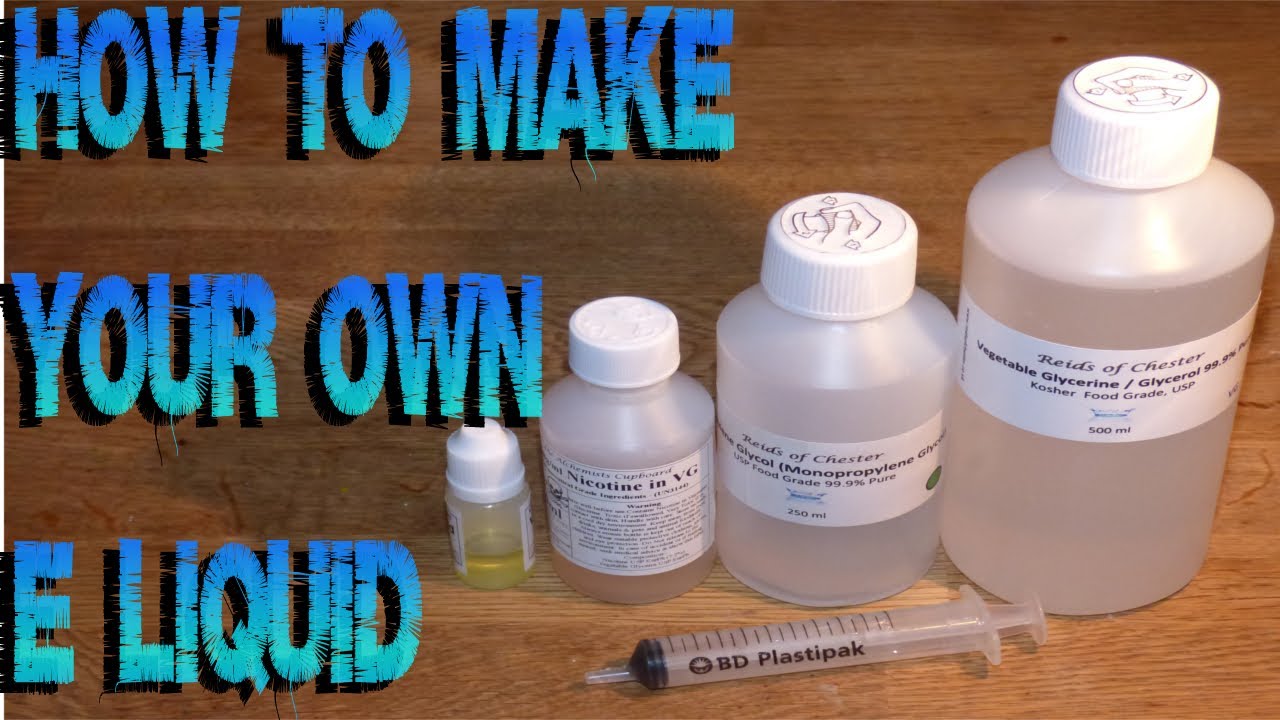 DIY e liquid, or DIY vape juice is an option for those who want to mix their own e-liquid and create their own unique flavor profile. It can also be fun for children and adults alike, but the process of mixing your own e-juice can sometimes seem complicated. This article will break down all the important factors to keep in mind when mixing DIY e-liquid so that it comes out perfect every time!
What is DIY e liquid? Diy is short for doing it yourself. This term is often used to describe someone who completes a task or project without the help of a professional. In the world of vaping, DIY means creating your own e-liquid using ingredients you can find at your local grocery store. There are many reasons why people choose to DIY their e-liquid: they want to control the ingredients, they want to save money, or they just prefer the challenge of making their own vape juice. There are a few things you need to keep in mind before starting down this DIY e-liquid road. First and foremost, make sure you understand the safety rules for vaping. Many of the chemicals used in DIY e-liquid are poisonous if ingested. Always use caution when handling these substances and follow all safety guidelines provided by your manufacturer. Second, be aware of the laws in your state or country regarding DIY e-liquid production. In some jurisdictions, it is illegal to produce your own e-juice without first obtaining a license from the government. Make sure you know the laws in your area before starting any process related to DIY vaping. What You'll Need to Make Your Own E Liquid If you're itching to take your vaping experience to the next level, there's no need to break the bank. In fact, many people make their own e-liquid using simple supplies and ingredients that are easy to obtain. Here's what you'll need to get started: -An e-cigarette -A Nicotine syringe or cartridge -Propylene Glycol (PG) or Vegetable Glycerin (VG) -A bottle with a dropper or squeeze bottle -Screw top lid -Enough quality nicotine pods or cartridges to fill the bottle(s) Let's take a look at each of these items in more detail.: 1. E-Cigarettes: You can use any type of e-cigarette, from basic cigalikes to more advanced mods. Just be sure that it has a replaceable battery and an internal tank (or cartomizer). If you're using bottled e-juice, remember to factor in the size of your tank and the amount of nicotine required per fill. Most e-cigarettes come with instructions on how to fill and use them, How To Make Your Own E Liquid If you’re like most vapers, you probably enjoy making your own e-liquid. But before you dive right in, there are a few things you need to know. This guide will teach you everything from how to choose the right ingredients to how to make your own DIY e-liquid. Making your own DIY e liquid recipes Making your own DIY e-liquid is a great way to customize your vaping experience and get creative with your flavors. But before you start making your own e-juice, there are a few things you need to know. In this blog post, we'll outline the basics of DIY e-liquid making and help you create some delicious recipes. First, let's discuss the ingredients you'll need for DIY e-liquid. Most of the ingredients you'll need are common kitchen items, but there are a few that may be harder to come by. If you can't find an ingredient listed below, don't worry - you can usually substitute something similar. Just be sure to test out your recipe before committing to it - sometimes substitutions result in unexpected flavors or outcomes. E-Liquid Ingredients: - Vegetable glycerin (VG) - A thick liquid used as a carrier for other ingredients, VG is available at most supermarkets and health stores. It's also widely available online. For most recipes, 1% or 2% VG will work well. - Propylene glycol (PG) - Another common ingredient found in many household items like toothpaste and Advantages of being a DIY e liquid What You Need To Know Before Going Beyond DIY e-liquid There are many reasons to become a DIYer when it comes to e-liquid. Here are four advantages of going beyond the basics: 1. Greater Control: When you make your own e-liquid, you have complete control over the ingredients and process. This gives you the ability to create products that are exactly what you want them to be, without interference from others. 2. Personalized Vaping Experiences: When you make your own e-liquid, you can tailor each vape experience to your own preferences and tastes. This means that you can find a flavor profile that is perfect for you and eliminates the need to settle for anything less than what you desire. 3. Greater Efficiency and Savings: When you make your own e-liquid, you can save money on ingredients and production costs. This allows you to create high quality products at a fraction of the cost of store-bought equivalents. 4. Increased Productivity and Efficiency: By becoming a DIYer, you will learn how to work efficiently within a given framework, which will increase your overall productivity in both personal and professional settings. Cautions when using DIY e liquid Ingredients Some people enjoy making their own e-liquid, either because they want to control the ingredients or because they want to know what is going into their vape. However, there are a few things to keep in mind when using DIY ingredients. First and foremost, make sure that you understand the laws in your state or country regarding vaping. Many states have laws that prohibit the use of DIY e-liquid, and some others allow for limited use of homemade products. Make sure you are aware of any local restrictions before starting to make your own e-liquid. Additionally, be aware of possible health risks when using DIY ingredients. Some chemicals used in manufacturing conventional cigarettes can also be found in some DIY e-liquids, and these chemicals can be harmful if inhaled. If you are concerned about health risks, it is best to stick to commercially produced e-liquid. Finally, be careful when mixing different types of nicotine into your DIY e-liquid. Different nicotine concentrations can create unexpected results when vaping, so it is important to test different formulations before launching them into the wild. Conclusion There's a lot of talk these days about "DIY e liquid" and the various products people are making on their own. While it can be fun to experiment with different flavors and ingredients, there are some things you should know before you start getting too creative with your e-liquid work. For one thing, not all ingredients are safe to use without proper guidance from a medical professional. Secondly, even if an ingredient is safe for DIY e liquid, using it in high quantities or at high temperatures could lead to dangerous consequences. Finally, unless you have experience working with flavorings and chemicals, it's probably not a good idea to try and make your own equipment – instead, consult with experts who can help you create quality e-liquid that will keep your devices running smoothly. 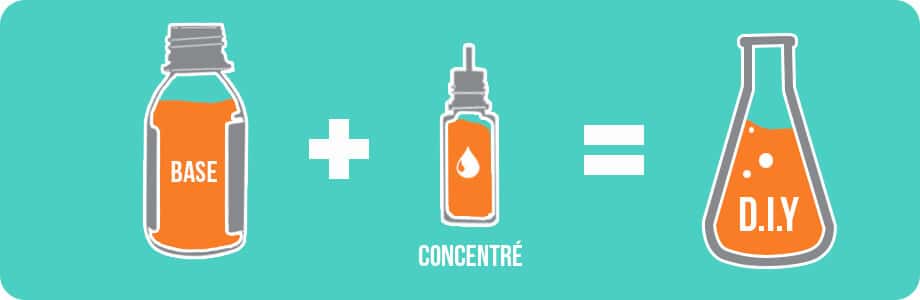 Vaping is a highly-effective and affordable way for people to consume nicotine without the harmful additives of smoking tobacco. However, vaping itself can be expensive when you purchase your e-liquid from a vape shop. In this article, we'll talk about how to make DIY e liquid at home by adding inexpensive ingredients like water, glycerin, and propylene glycol.
The Value of DIY e liquid Are you tired of spending money on vape juice that you don't even like? Do you want to be able to make your own e-liquid and save money in the process? If so, this DIY article is for you! In this article, we'll discuss the value of DIY e liquid and give you a few tips on how to make it easier on your wallet. The first thing to consider when making your own e-liquid is the cost of ingredients. More often than not, premade e-liquids are expensive. While there are certainly exceptions, the vast majority of e-liquids available on the market are made with high-quality ingredients that can cost you a pretty penny. By making your own e-liquid, you can control the cost of each and every bottle. On top of controlling costs, making your own e-liquid also allows you to customize each and every bottle. This means that you can create a flavor profile that is specific to your preferences. If you're sick of using the same old flavors all the time, making your own e-liquid is an excellent way to change things up. Another reason why making your own e-juice is a great What Are the Ingredients and How Do I Mix Them? Making your own e-liquid is a great way to save money and avoid harmful chemicals. In this article, we will discuss the ingredients and how to mix them together to make your own e-liquid. To make DIY e liquid, you will need to start with a base nicotine liquid, propylene glycol, vegetable glycerin, and flavoring. The base nicotine liquid is what gives your e-liquid its nicotine content. You can find it at most stores that sell vaping supplies. Propylene glycol is a common ingredient in many vape liquids because it helps create a realistic vaporization experience. Vegetable glycerin is a organic compound that is commonly used in foods and medicine. Flavoring is what gives your juice its unique flavor. There are dozens of flavors available on the market, so it is important to choose one that you will enjoy. Once you have all of the ingredients, you will need to mix them together using an electronic mixer. Dosages, Nicotine Levels, and PG/VG Ratios If you're new to vaping, or just want to make your e-liquid cheaper, there are a few things you need to know about dosages, nicotine levels, and PG/VG ratios. Here's a quick rundown: Dosages - Most DIY e liquid brands offer 3, 6, 12, and 24 mg/mL nicotine levels. If you're looking for a lower nicotine level (for children or those who are generally low nicotine smokers), go with 3 mg/mL. If you want a higher nicotine level (for people who like a strong nicotine hit), go with 6 mg/mL. And if you want the middle ground (3 mg/mL is slightly stronger than 6 mg/mL but not as strong as 12 mg/mL), that's the recommended dosage. Nicotine Levels - Most vapers start out at 3 mg/mL nicotine and work their way up as they become more comfortable with vaping. Some people may prefer higher nicotine levels (6 or 12 mg/mL) while others may prefer lower nicotine levels (3 mg/mL). It really depends on your own preferences and habits. PG/VG Ratios - PG stands for propylene gly Pricing Your DIY e liquid Pricing your DIY e-liquid can be a bit tricky and confusing. There are so many different prices out there for different ingredients, and it can be hard to know what you're getting yourself into. Here are a few tips to help you price your e-liquid correctly: 1. Start with the cost of the nicotine oil. This is usually the most expensive ingredient in a DIY e-liquid recipe, accounting for up to 75% of the total cost. 2. Add in the cost of the propylene glycol. This is a common ingredient in DIY e-liquids and accounts for up to 20% of the total cost. 3. Add in the cost of flavoring agents and other additives, like tartrazine or aspartame. These can range from negligible to slightly more expensive than propylene glycol, but they shouldn't add too much to the final price tag. 4. Factor in manufacturing costs, which can amount to anywhere from $0.50 to $5 per bottle depending on the complexity of the recipe. This includes things like adding flavoring, testing batches for flavor and consistency, and packaging costs. Conclusion When it comes to choosing an DIY e liquid, there are many factors to consider. Cost is certainly one of them, but making your own e-juice can be expensive if you don’t know what you’re doing. In this article, we will go over the basics of DIY e liquid making so that you can make your vaping experience more affordable without sacrificing quality. We will also cover some helpful tips for keeping your costs down while still producing high-quality flavors. So whether you’re just getting started with vaping or want to save a little money on your next purchase, read on!  If you're someone who loves to try new things, DIY E-Liquids are a must-have. The right mix can make your favourite e-juice taste incredible, but don't let the process intimidate you!
Dispelling the rumors about DIY E Liquids There is a lot of misinformation out there about DIY e-liquid. People think that it’s dangerous, or that it’s not as good as the stuff that you can buy in stores. But that’s not true at all. In fact, DIY e-liquid can be a great way to improve your skills and learn some new techniques. Here are some reasons why you should consider making your own e-liquid: 1. You Can Control The Quality And Quantity Of Your E Liquid You can control the quality and quantity of your e-liquid by using high-quality ingredients and equipment. This means that you can make e-liquid that is exactly what you want it to be. 2. It’s A Great way To Learn About Chemistry And How E Liquids Work Making your own e-liquid is a great way to learn about chemistry and how e-liquids work. You can learn about different ingredients and how they interact with each other. This knowledge will help you when you start making commercial e-liquids later on in your career. 3. It’s Fun And Enjoyable! Making your own What are the potential benefits of DIY E Liquid? DIY E-Liquid is becoming increasingly popular among vapers. There are a number of potential benefits to taking this route, including saving money and having more control over the ingredients used in your e-liquid. Here are four reasons why DIY E Liquid is a great option for vapers: 1. You Can Control The Cost Of Your E-Liquid One of the benefits of DIY E-Liquid is that you can control the cost of your e-liquid. This is because you can create e-liquids using high-quality ingredients that are cheaper than those found in pre-packaged e-liquid brands. 2. You Can Customize The Flavors Of Your E-Liquid Another benefit of DIY E Liquid is that you can customize the flavors of your e-liquid. This means that you can create unique e-liquids that appeal to your personal taste. This is a significant advantage over pre-packaged e-liquid brands, which usually offer only a limited number of preselected flavors. 3. You Can Choose To Use High Quality Components In Your E-Liquids One downside of pre-packaged e-liquid brands is that they often use low Tips for choosing the right ingredients If you're thinking about starting your own e-liquid production business, there are a few things you'll want to keep in mind. Here are some tips for choosing the right ingredients and getting started. Ingredients: First and foremost, you'll need to choose the correct ingredients for your e-liquid. This is important because it will affect the flavor, smell, and nicotine levels of your final product. Here are some tips for choosing the right ingredients: -Choose organic and natural ingredients whenever possible. These ingredients are safer and have less impact on the environment. -Look for flavors that are unique and original. This will help to set your product apart from others on the market. -Choose nicotine levels that fit your needs. Some people prefer low nicotine levels while others prefer high nicotine levels. Be sure to select a level that works best for you. Packing Your E-Liquid: Next, you'll need to pack your e-liquid correctly if you want it to arrive safe and sound. Here are some tips for packing your e-liquid correctly: How to create your own flavors If you're a fan of electronic cigarettes, you'll love DIY e-liquid. It's a great way to create your own unique flavors and experiment with different nicotine levels. There are many reasons why you should start making your own e-liquid. First of all, it's much cheaper than buying pre-made e-juices. Plus, you can customize the flavors to exactly what you want. Another big advantage of making your own e-liquid is that you can control the nicotine levels. This is great if you want to avoid dependence on nicotine replacement therapy (NRT). You can also make very high-strength e-liquids if you want. If you're interested in becoming a professional e-liquid maker, there are a few things that you need to learn. First, you need to understand how to create a volatile compound. This is essential for creating complex flavors and aromas. Second, you need to know how to make different types of vaping devices. Finally, you need to have knowledge about safety protocols and hygiene practices. With a little effort, mastering DIY e-liquid will give you the skills necessary to become a successful professional vape maker. Adding nicotine to your e-liquid If you're like most vapers, you love the taste and smell of your e-liquid. But did you know that you can also add nicotine to your e-liquid? In fact, nicotine is one of the most popular additives for e-liquid. Why is nicotine so popular? Well, nicotine is a stimulant and it helps to provide a smooth, satisfying vaping experience. It also enhances the flavor and aroma of your e-liquid. You can even use nicotine extractions to create high-quality nicotine e-liquids that are free from harsh chemicals. Adding nicotine to your e-liquid is a great way to make it more addictive. In fact, many professional vapers use nicotine as their primary additive because it enhances their vaping experience. If you're interested in becoming a professional vape chemist, adding nicotine to your e-liquid may be the key to success. Completing your e-liquid and bottling it If you're like most people, you've probably been curious about DIY e-liquid for a while now. But have you ever stopped to think why it's so great? After all, it's not as if making your own nicotine juice is rocket science. In this article, we'll outline the reasons why DIY e-liquid is such a great idea, and why you should start making it today. First of all, making your own e-liquid is a great way to customize your nicotine experience. If you're a smoker who wants to cut down on the number of cigarettes they smoke each day, or if you just want to try something new,DIY e-liquid is the perfect solution. You can choose from a wide variety of flavors and add them to your nicotine mix according to your personal preferences. This means that no two vapes will be the same! Another big reason to start DIYing your e-liquid is financial. Most vapers make their own e-liquid using high-quality ingredients. This means that you'll be getting more value for your money than if you bought pre-packaged juices from the store. Plus, there's no need to worry about leaking bottles or wasting any e Simulating different experiences with DIY E-Liquids DIY E-Liquid is one of the most popular trends that has been growing in popularity over the last few years. It has many benefits that are difficult to beat, and it can be a great way to simulate different experiences with your vape. Here are some reasons why you should start making your own e-liquid: 1. You control the ingredients. There are no harsh chemicals or artificial flavors in DIY E-Liquids, which means you can create products that are exactly what you want them to be. This allows you to experiment with different flavors and combinations without worrying about any risks. 2. It’s cheaper than buying pre-made e-liquid. If you’re like most vapers, you probably buy pre-made e-liquid every time you run out. But homemade e-liquid is much cheaper and easier to make than buying pre-made e-liquid from a store. All you need is a good electronic device and some ingredients. 3. It tastes better than pre-made e-liquid. Most people agree that DIY E-Liquid tastes much better than pre-made e-liquid. This is because commercial e-liquids are often filled Conclusions Making your own e-liquid is one of the most rewarding things you can do for yourself as a vaper. Not only will you be able to control the ingredients and flavors that go into your e-liquid, but you’ll also learn a lot about how vaping works and how to make it even more enjoyable. Here are some of the reasons why DIY e-liquid is a great idea: 1. It’s customizable. You can choose the ingredients and flavors that go into your e-liquid, which means that you can create something that’s exactly what you want it to be. 2. It’s cheaper than buying pre-made e-liquids. If you don’t have any experience making e-liquid, buying pre-made e-liquids can be expensive. But with DIY e liquid, you can make your own liquids at a fraction of the cost of store-bought e-liquids. 3. You control the quality and safety of your ingredients. With DIY e liquid, you know exactly what’s going into your liquid, which means that you can be confident in its quality and safety |
AuthorWrite something about yourself. No need to be fancy, just an overview. Archives
August 2022
Categories
All
|
 RSS Feed
